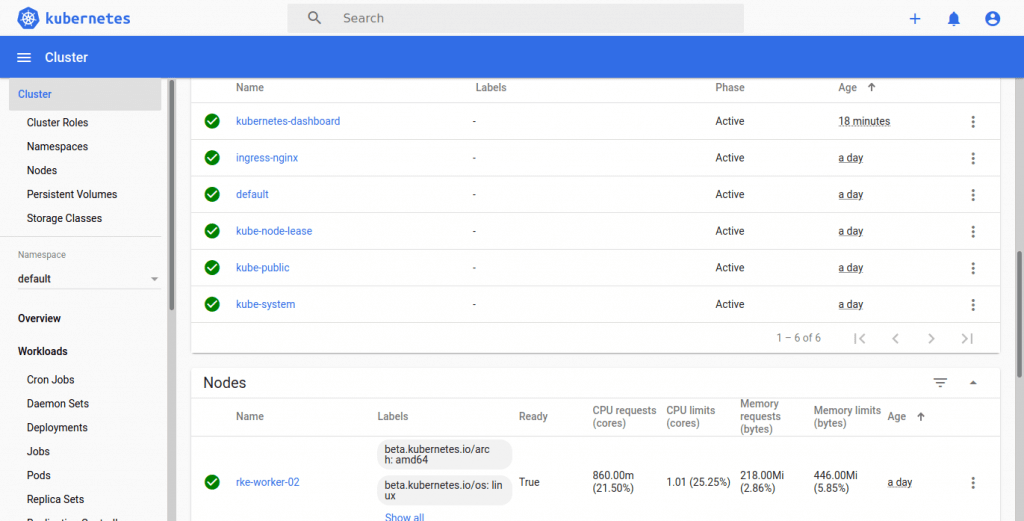
Kubernetes dashboard is a web-based user interface which provides information on the state of the Kubernetes cluster resources and any errors that may occur. The dashboard can be used to deploy containerized applications to the cluster, troubleshoot deployed applications, as well as the general management of the cluster resources.
The deployment of Deployments, StatefulSets, DaemonSets, Jobs, Services and Ingress can be done from the dashboard or from the terminal with kubectl. if you want to scale a Deployment, initiate a rolling update, restart a pod, create a persistent volume and persistent volume claim, you can do all from the Kubernetes dashboard.
Source : kubernetes.io
Install kubectl on Linux
curl -LO https://storage.googleapis.com/kubernetes-release/release/`curl -s https://storage.googleapis.com/kubernetes-release/release/stable.txt`/bin/linux/amd64/kubectl
chmod +x ./kubectl
sudo mv ./kubectl /usr/local/bin/kubectl
Confirm your installation of kubectl.
$ kubectl version
Client Version: version.Info{Major:"1", Minor:"22", GitVersion:"v1.22.2", GitCommit:"8b5a19147530eaac9476b0ab82980b4088bbc1b2", GitTreeState:"clean", BuildDate:"2021-09-15T21:38:50Z", GoVersion:"go1.16.8", Compiler:"gc", Platform:"linux/amd64"}
Server Version: version.Info{Major:"1", Minor:"22", GitVersion:"v1.22.2", GitCommit:"8b5a19147530eaac9476b0ab82980b4088bbc1b2", GitTreeState:"clean", BuildDate:"2021-09-15T21:32:41Z", GoVersion:"go1.16.8", Compiler:"gc", Platform:"linux/amd64"}
Configure Kubectl
The kubectl tool looks for a file named config in the $HOME/.kube directory, but a separate file can be specified using --kubeconfig option. The kubeconfig files helps you to organize information about clusters, users, namespaces, and authentication mechanisms.
$ ls $HOME/.kube/config
/home/root/.kube/config
cat .kube/config
apiVersion: v1
clusters:
- cluster:
certificate-authority-data: LS0tLS1CRUdJTiBDRVJUSUZJQ0FURS0tLS0tCk1JSUJWakNCL3FBREFnRUNBZ0VBTUFvR0NDcUdTTTQ5QkFNQ01DTXhJVEFmQmdOVkJBTU1HR3N6Y3kxelpYSjIKWlhJdFkyRkFNVFUzTkRNNE16ZzJOVEFlRncweE9URXhNakl3TURVeE1EVmFGdzB5T1RFeE1Ua3dNRFV4TURWYQpNQ014SVRBZkJnTlZCQU1NR0dzemN5MXpaWEoyWlhJdFkyRkFNVFUzTkRNNE16ZzJOVEJaTUJNR0J5cUdTTTQ5CkFnRUdDQ3FHU000OUF3RUhBMElBQkpsb3NSY1FRTHlsL28yeFltQ0l4eHdsZ1F3ZTdlU1dxQmNaRFQ3Q2xJcXoKNnB4R24yb2w3MHM3N3dpcTNaRnkrSW0vdFhHSW16Y3N6MHFNYUpjUy9rV2pJekFoTUE0R0ExVWREd0VCL3dRRQpBd0lDcERBUEJnTlZIUk1CQWY4RUJUQURBUUgvTUFvR0NDcUdTTTQ5QkFNQ0EwY0FNRVFDSUVJcjZ6NGRMUUw1Ck8wSUN3ejBWUEdhYUs0bEU3bFU3SmJXTWhoRk9vcDh1QWlBKzZhcG9NMFVtZ1IxYkFBeWNaS0VHL3AzQWRhWmEKMWV3TGxmUkxiWkJwa3c9PQotLS0tLUVORCBDRVJUSUZJQ0FURS0tLS0tCg==
server: https://127.0.0.1:6443 #CHANGE TO LB OR MASTER NODES
name: default
contexts:
- context:
cluster: default
user: default
name: default
current-context: default
kind: Config
preferences: {}
users:
- name: default
user:
password: 76dd75552cb14f3085445277a2091c6c
username: adminGet the Cluster URL, CA data, and user credentials then substitute in the file.
Deploy Kubernetes Dashboard
The default Dashboard deployment contains a minimal set of RBAC privileges needed to run. You can deploy Kubernetes dashboard with the command below.
kubectl apply -f https://raw.githubusercontent.com/kubernetes/dashboard/master/aio/deploy/recommended.yamlYou can as well download and apply the file locally:
wget https://raw.githubusercontent.com/kubernetes/dashboard/master/aio/deploy/recommended.yaml
kubectl apply -f recommended.yaml
Set Service to use NodePort
This will use the default values for the deployment. The services are available on ClusterIPs only as can be seen from the output below:
$ kubectl get svc -n kubernetes-dashboard
NAME                        TYPE        CLUSTER-IP      EXTERNAL-IP   PORT(S)    AGE
dashboard-metrics-scraper   ClusterIP   10.104.220.36   <none>        8000/TCP   23s
kubernetes-dashboard        ClusterIP   10.108.11.22    <none>        443/TCP    25s
Patch the service to have it listen on NodePort:
kubectl --namespace kubernetes-dashboard patch svc kubernetes-dashboard -p '{"spec": {"type": "NodePort"}}'Confirm the new setting:
$ kubectl get svc -n kubernetes-dashboard kubernetes-dashboard -o yaml
...
spec:
  clusterIP: 10.108.11.22
  clusterIPs:
  - 10.108.11.22
  externalTrafficPolicy: Cluster
  internalTrafficPolicy: Cluster
  ipFamilies:
  - IPv4
  ipFamilyPolicy: SingleStack
  ports:
  - nodePort: 30506
    port: 443
    protocol: TCP
    targetPort: 8443
  selector:
    k8s-app: kubernetes-dashboard
  sessionAffinity: None
  type: NodePort
status:
loadBalancer: {}- NodePort exposes the Service on each Node’s IP at a static port (the NodePort). A ClusterIP Service, to which the NodePort Service routes, is automatically created.
$ vim nodeport_dashboard_patch.yaml
spec:
  ports:
  - nodePort: 32000
    port: 443
    protocol: TCP
    targetPort: 8443
EOF
Apply the patch
kubectl -n kubernetes-dashboard patch svc kubernetes-dashboard --patch "$(cat nodeport_dashboard_patch.yaml)"Check deployment status:
$ kubectl get deployments -n kubernetes-dashboard
NAME                        READY   UP-TO-DATE   AVAILABLE   AGE
dashboard-metrics-scraper   1/1     1            1           86s
kubernetes-dashboard        1/1     1            1           86s
Two pods should be created – One for dashboard and another for metrics.
$ kubectl get pods -n kubernetes-dashboard
NAME                                         READY   STATUS    RESTARTS   AGE
dashboard-metrics-scraper-7b64584c5c-xvtqp   1/1     Running   0          2m4s
kubernetes-dashboard-566f567dc7-w59rn        1/1     Running   0
confirm if the service was actually created.
$ kubectl get service -n kubernetes-dashboard
NAME                        TYPE        CLUSTER-IP      EXTERNAL-IP   PORT(S)         AGE
dashboard-metrics-scraper   ClusterIP   10.103.159.77   <none>        8000/TCP        8m40s
kubernetes-dashboard        NodePort    10.101.194.22   <none>        443:32000/TCP   8m40
Create Admin service account
start by creating a Service Account manifest file. I’ll name the service account admin.
$ vim admin-sa.yml
---
apiVersion: v1
kind: ServiceAccount
metadata:
  name: admin
  namespace: kube-system
admin is the name of the service account to be created.
Create a Cluster Role Binding
Next is to assign the service account created a cluster role binding of cluster-admin.
$ vim admin-rbac.yml
---
apiVersion: rbac.authorization.k8s.io/v1
kind: ClusterRoleBinding
metadata:
  name: admin
roleRef:
  apiGroup: rbac.authorization.k8s.io
  kind: ClusterRole
  name: cluster-admin
subjects:
  - kind: ServiceAccount
    name: admin
    namespace: kube-system
Replace admin with the name of the service account you created in step 1.
Apply the file.
kubectl apply -f admin-rbac.ymlObtain admin user token
print the generated token for a service account by using the kubectl command.
Set a variable to store the name of the service account.
SA_NAME="admin"Then run the command below to print the token for the admin user created.
kubectl -n kube-system describe secret $(kubectl -n kube-system get secret | grep ${SA_NAME} | awk '{print $1}')Output:
Name:         admin-token-mm9jd
Namespace:    kube-system
Labels:       <none>
Annotations:  kubernetes.io/service-account.name: admin
              kubernetes.io/service-account.uid: 80fade4b-4270-11ea-9fe4-005056ba45bd

Type:  kubernetes.io/service-account-token

Data
====
token:      eyJhbGciOiJSUzI1NiIsImtpZCI9IiJ9.eyJpc7MiOiJrdWJlcm5ldGVzL3NlcnZpY2VhY2NvdW50Iiwia3ViZXJuZXRlcy5pby9zZXJ2aWNlYWNjb3VudC9uYW1lc3BhY2UiOiJrdWJlLXN5c3RlbSIsImt1YmVybmV0ZXMuaW8vc2VydmljZWFjY291bnQvc2VjcmV0Lm5hbWUxOiJqa211dGFpLWFkbWluLXRva2VuLW1tOWpkIiwia3ViZXJuZXRlcy5pby9zZXJ2aWNlYWNjb3VudC9zZXJ2aWNlLWFjY291bnQubmFtZSI6ImprbXV0YWktYWRtaW4iLCJrdWJlcm5ldGVzLmlvL3NlcnZpY2VhY2NvdW50L3NlcnZpY2UtYWNjb3VudC51aWQiOiI4MGZhZGU0Yi00MjcwLTExZWEtOWZlNC0wMDUwNTZiYTQ1YmQiLCJzdWIiOiJzeXN0ZW06c2VydmljZWFjY291bnQ6a3ViZS1zeXN0ZW06amttdXRhaS1hZG1pbiJ9.uMC2ydeHF4jVA5tnKFbBeHRvc4NWqL920jigk2FDeduUdBuFhsNyDcscmL-pBbWHG5KKwOAEuAAeyNaknaHsDadNnbLpp4AMZTTdr22FEp-_v7MfIEQm3QWmq-c0ykpdrzUzGmk5Q3JIpfqeorDI0lZd52-DF4IVMw3VtTNp6ZMHdieQUNRnCEyfs98raCTRAotiXZQaMvmRW5s9peu5hfxM71jufg-Qzmflr9nO-dY2dOHh1WZcKhJqfNfB73GYX2TQlUlurV4Oy0-2CpUUpJ1HAjcSHzKGuSrMUAMAhRwhbZZXhwvbQ6Ei_9Vv2PkD8_Pw9c-k9x-bblFSAqyFhA
ca.crt:     1025 bytes
namespace:  11 bytes
Copy the contents in token key.
Accessing Kubernetes Dashboard
Service deployment was assigned a port 32000/TCP.
# Example
https://103.89.1.230
:32000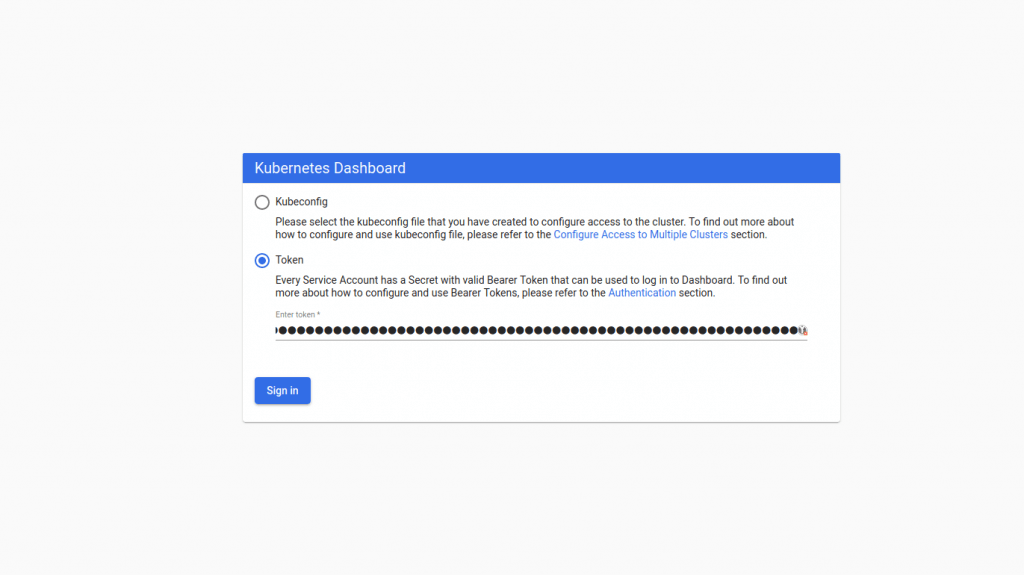
Nginx Ingress:
---
apiVersion: extensions/v1beta1
kind: Ingress
metadata:
  name: k8s-dashboard
  namespace: kubernetes-dashboard
  annotations:
    nginx.ingress.kubernetes.io/secure-backends: "true"
    nginx.ingress.kubernetes.io/ssl-passthrough: "true"
spec:
  tls:
    - hosts:
      - k8sdash.mydomain.com
      secretName: tls-secret
  rules:
    - host: k8sdash.mydomain.com
      http:
        paths:
        - path: /
          backend:
            serviceName: kubernetes-dashboard
            servicePort: 443